Thursday, December 20, 2012

Half done planking!


Spreading epoxy on to the boat in order to attach plank 3 on the port side. We had to work as a team.

We clamped plank 3 to the stem using a squeeze clamp.


  We used the claw side of the hammer as a lever to put the wedges in the plywood clamps.

We glanced underneath the boat & looked for gaps, if a gap was found it had to be clamped. Also, cleaned up extra glue.


We used a rabbet plane to cut the gain.
We prepped the boat for plank 4.

We spoke-shaved the rudder to make it hydrodynamic.
We used a power plane to flatten a 2" surface where the keel will sit.


Thursday, December 13, 2012

Plank 3


We are planing the land for plank 3 to be glued on.


We are using the jigsaw to cut out plank 4.


We are spreading glue on plank 3 and the land of plank 2.

After we have spread glue, we are carefully lining up plank 3. 


We are putting on clamps and scraping up the extra glue. 

Clamps are in place and we wait for the glue to dry.

Friday, December 7, 2012

Plank 2 is on Port and Starboard and we were on the local news!


This week we were highlighted on Jet TV Action News in Erie! http://yourerie.com/fulltext?nxd_id=272302  The video is posted on our website.


We marked where the epoxy needed to go on plank 2 for the starboard side.

Spreading glue on plank two.

We clamped plank 2 on to the port side, while we waited for the epoxy to dry.
( We used over 40 clamps! )

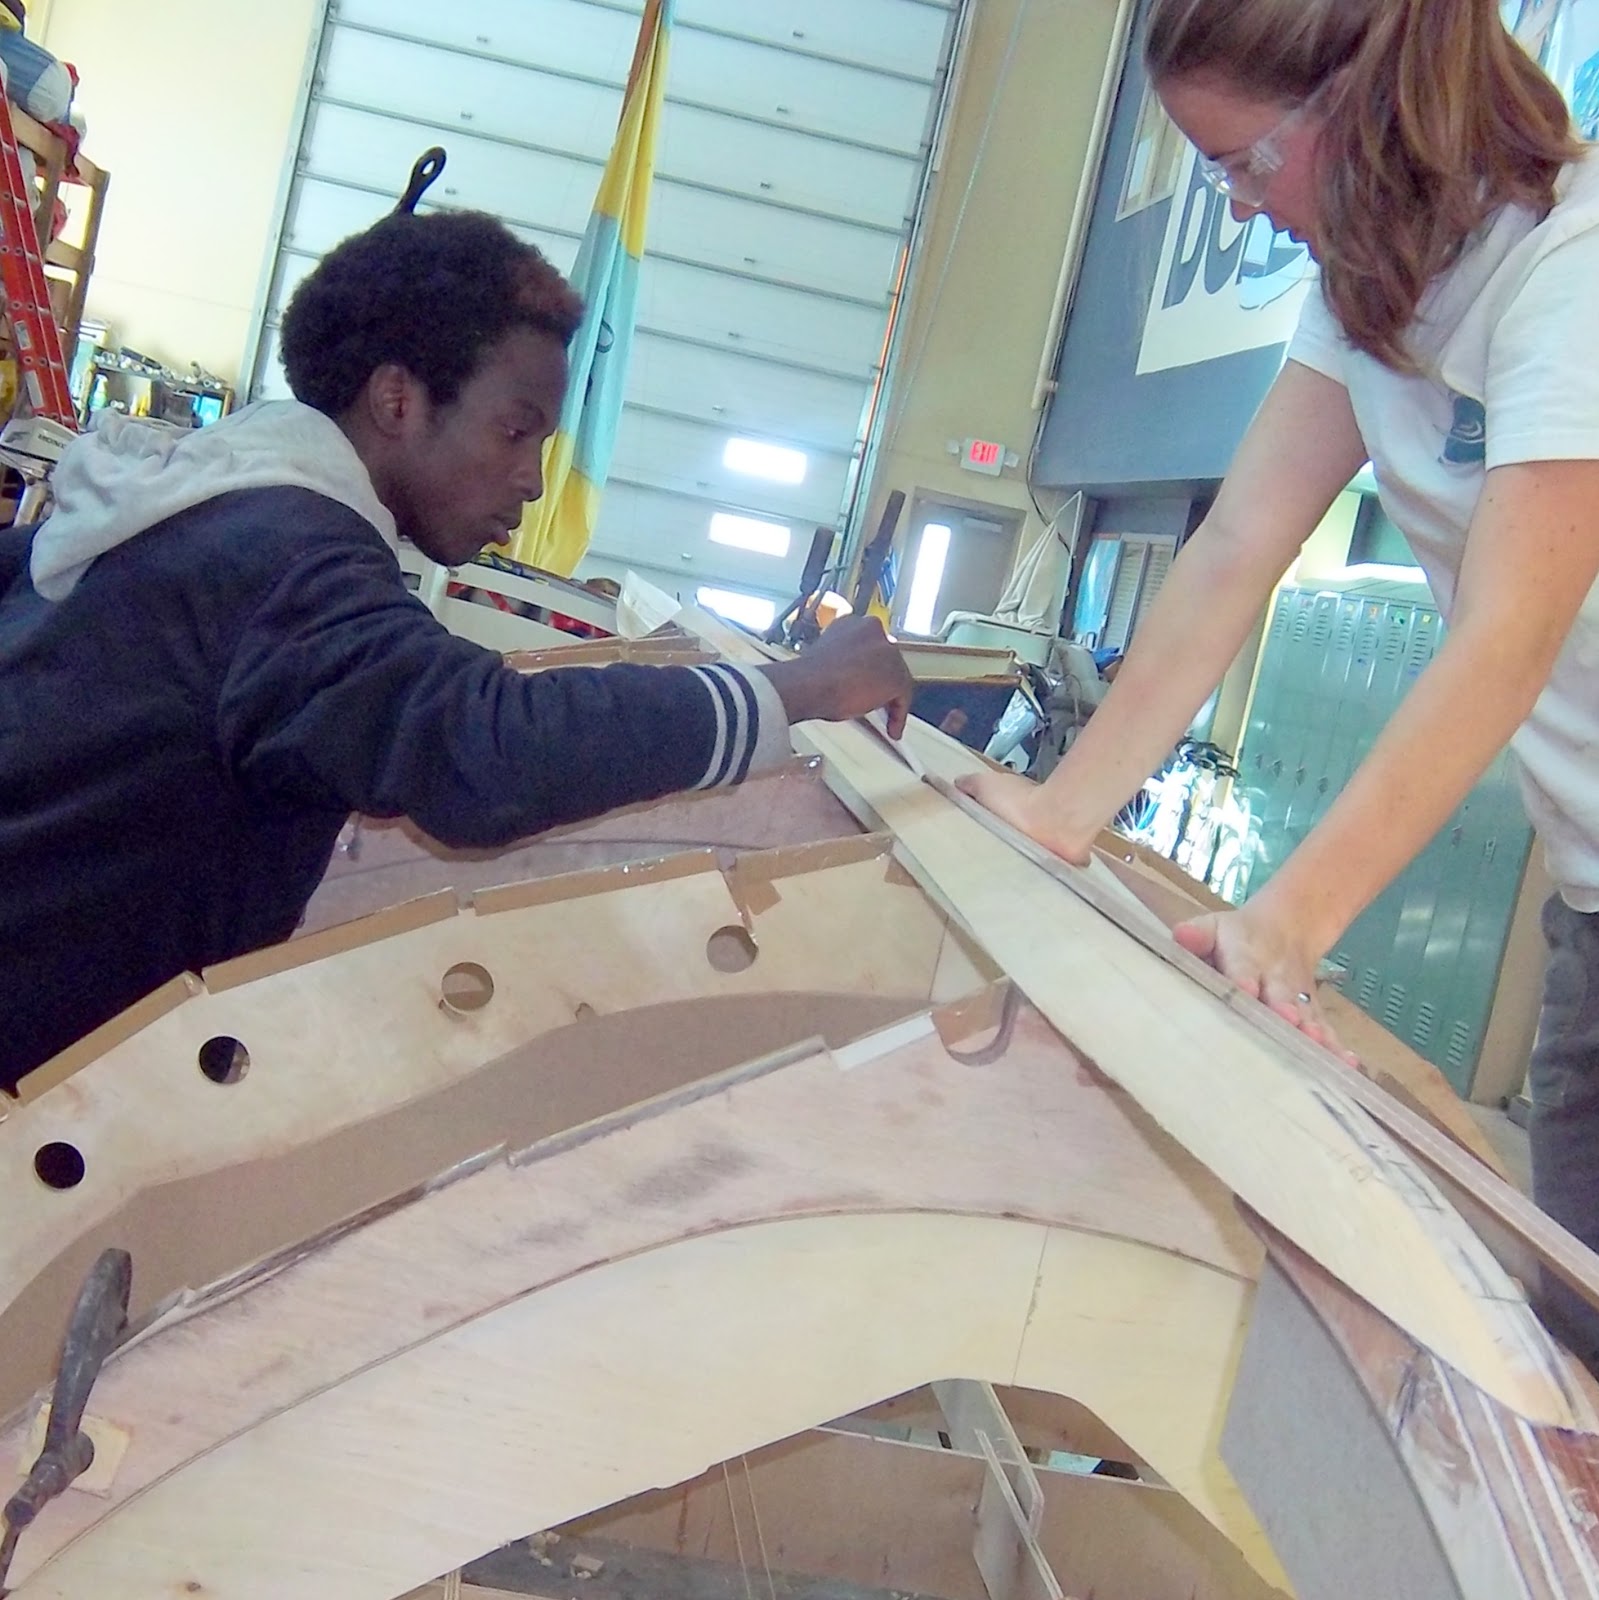
We used epoxy to glue plank 3 together.


We used a spoke shave to plane a bevel in the land.
The land is the area that the next plank would be glued on to. 
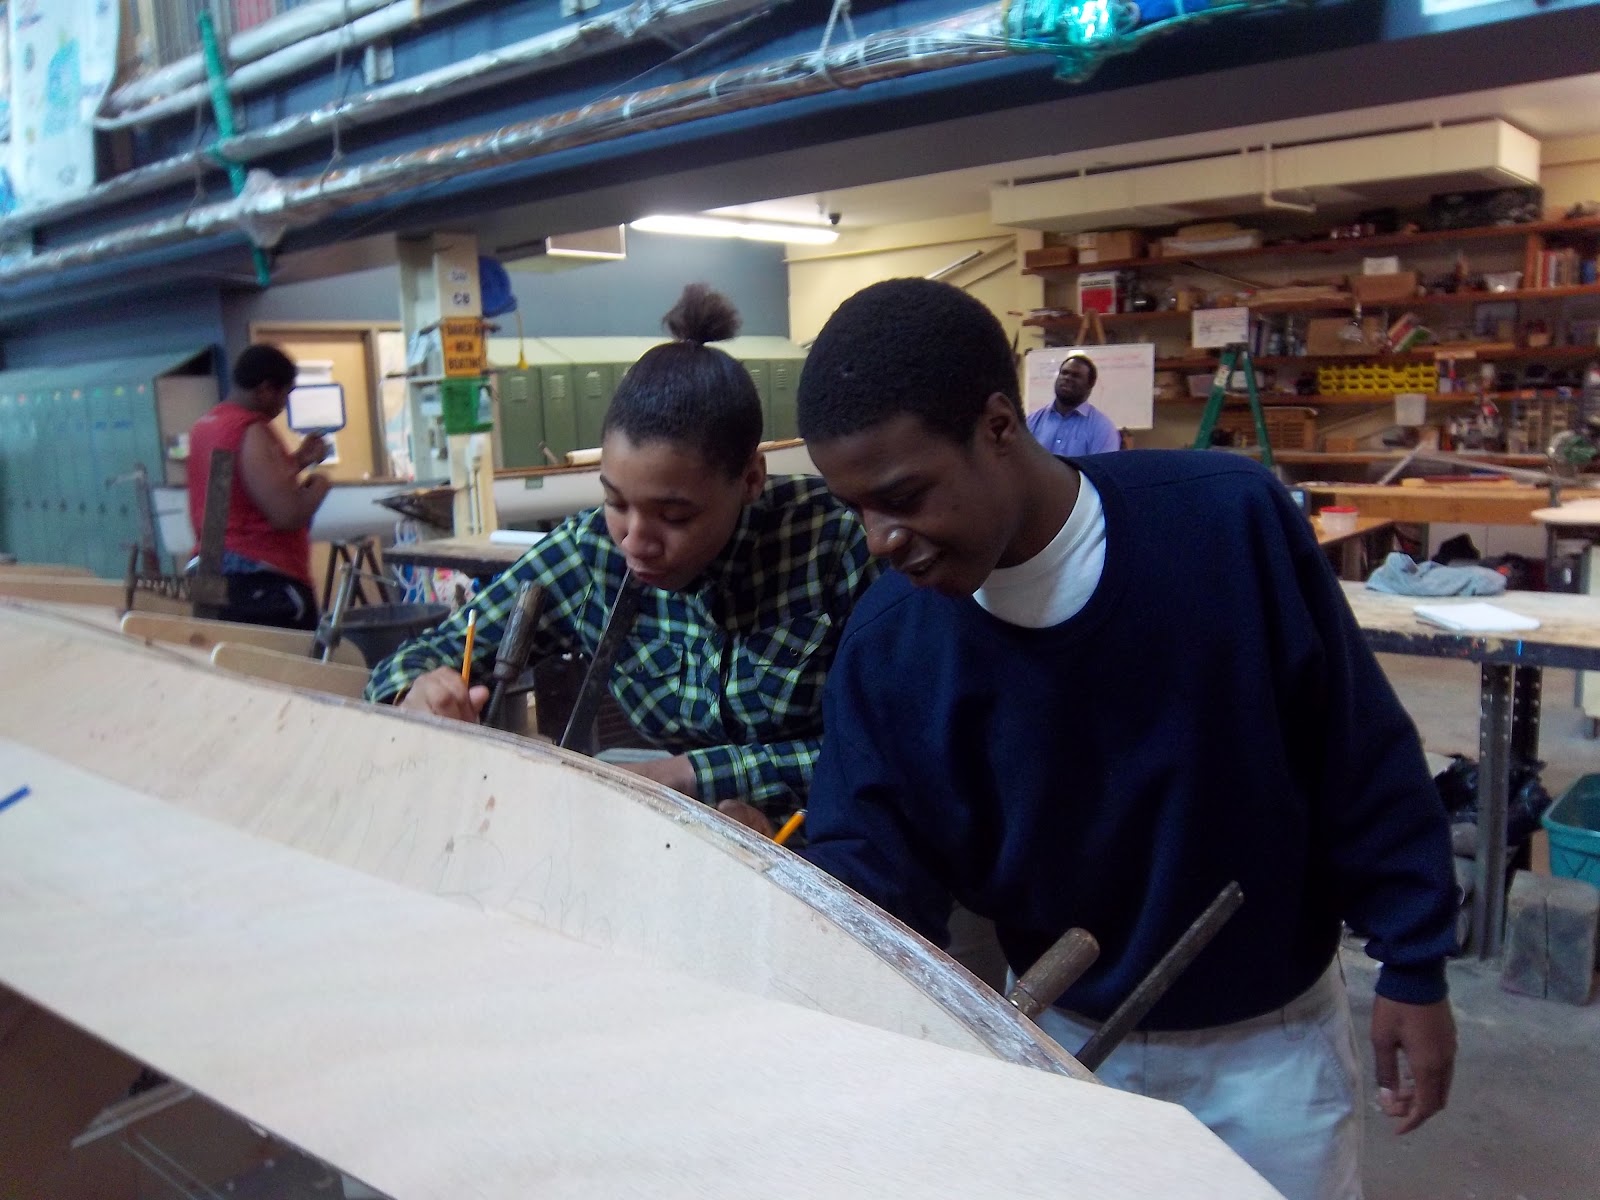
Upper left, Jet TV is here talking to our Executive Director, Rich Eisenburg.
We used a rasp to bevel the frame.


We gave it 100 percent effort to build the boat to this point and we would like to thank Jet TV Action News for coming to our school and observing the work we have done so far.  If anyone else is interested in stopping by please let us know.  We hope we were a inspiration to everybody that has seen the boat so far.   
Thank you.

Tuesday, December 4, 2012

Preparing the second planks


We cut the gain with a rabbet plane into the garboard plank at the stern, so that the second plank will be glued to the stem. We set up a fence to help guide the rabbet plane.


We beveled the frames with a spoke shave
We used a rasp to make the frames a right angle where the corner of the plank will sit.

Friday, November 16, 2012

port side garboard plank


We dry fit the port side garboard plank and glued it to the boat. Then we cleaned the squeeze out using a putty knife.

We clamped the garboard to the stem while waiting for the glue to dry.


We glued up plank 2; while we waited for the glue to dry, we used a spoke shave to bevel the frames on the boat.


Friday, November 9, 2012

Garboard plank


We dry fit the garboard plank with C clamps and bar clamps to look for gaps, then we had to retape the molds so they don't get glued to our boat. Next, we had to file down the frames to a right angle so that the garboard plank fit properly. Finally, we traced to mark spots in order to know where to spread epoxy on the keelson, frames, stems and also on the garboard plank.
We spread epoxy on the starboard side of the hog and on the garboard plank.
After we applied epoxy we clamped, screwed, and put weights on every square inch. The most difficult part was clamping the twist of the garboard plank at the bow and stern. Then we cleaned up the squeeze out using a putty knife. THE BEST PART NOW IS THAT WE ARE A SIXTH DONE WITH ONE SIDE!

Friday, November 2, 2012

Planing the keelson

We used a block plane to plane down the hog (keelson) to fit the garboard plank.

We are fitting the garboard plank to the hog (keelson), stem, and frames in order to make sure it's fair. We still have to plane more off the keelson for a perfect fit.  Look at the twist from midships to the stem!


Friday, October 26, 2012

The beginning of the beginning!


Using a plumb bob, we found the center line on the floor to double check where our stem support brackets were landingThey were perfectly in line with the rest of our set up!  We used the caulking gun to glue the stand to the floor to support the stems.


We put the glued up garboard planks on to the setup to see how they fit, they look great!

Finally! We are epoxying the hog to the stems and frames. 


We clamped it up and double checked to make sure it was centered on our marks. Then we cleaned up the excess epoxy.

Friday, October 19, 2012

Finalizing our setup

We screwed the molds to the strong back, while making sure they were perpendicular.
The piece we used for the keelson was 1/4" too thin, so we added wood to make it the 1 1/2" that is required in the plans.  We marked the pieces of the keelson to make sure they were centered. Then we glued it together using epoxy.  We then clamped it to our bench so it holds in place and dries flat.


The start of the garboard plank

We are squaring up the molds using the speed square and clamping the keelson in place.
We are gluing the garboard plank, which is the first plank to go on our set up. While lining up the scarph joints, we made sure the hole points were in a straight line using a level.

Before gluing up your first planks, it is SO IMPORTANT to watch this video about plank glue ups.  Forward to the 5 minute mark - the first part of the video is about different techniques for cutting scarph joints.  Study the sheets in the plans and mark the holes that you are supposed to line up!

Friday, October 12, 2012

Another hard working week!


 "I broke all my nails but one."  -D'Lachanique
Gluing and clamping the last two frames together.
Cleaning up the frames, we used a round over router bit to make the edges that will be seen in our boat smooth.
Using the orbital sander to clean up epoxy on the frames.
Clamping the frame down to the moulds. Everything lines up!
Planning ahead, we used packing tape to tape off the ends of each mould so when we plank the boat the epoxy will not stick to the moulds.

Starting on the stems and "hog" (keelson)

In our lumber rack, we had a perfect piece of knot-free Spruce to use for the "hog" or the keelson.  We used a router to round the edges of the hog so it would fit nicely into the mould set-up. 

Gluing the inner stems together. We decided to use the marine plywood stems that came with the kit instead of making them out of hardwood.  


Friday, October 5, 2012

All stations are up!


The set up of all the moulds went quickly.
We cut out the stem support brackets and added them to the set up.  
All the moulds are clamped on until we get them parallel and square. We built stands to hold our stem guides at the right height at both the bow and stern.  Once we get  the stem guides centered on our set up and squared to the moulds, we'll glue them to the floor too.   
Putting the gussets back in after they were modified to fit the set up. 


The shop has great natural light...


 While the new gussets were added to stiffen the frame; we epoxied the first 2 frames together and clamped them carefully.  Once we got them perfectly lined up, we let them sit over night until the epoxy cures.